Connection Instructions

How to Join Our Online Events via Video/Web Conference 

Introduction

We use the Zoom video/web conferencing platform for all of our online events. Zoom’s features exceed conventional in-person classroom capabilities and enhance learning, including convenient recording of the sessions for people who missed it, or for participants who would like to review a section they did not fully understand yet.

  • Video and audio conferences of many participants, with the person currently speaking automatically being highlighted on the screen.
  • Screen sharing of individual application windows, entire computer screens, and iPads/iPhones.
  • Joint handwriting onto a digital whiteboard by multiple participants simultaneously, as if you were together in a room with a black/whiteboard (the white can be later saved as an image file and made available to all participants).
  • Audio/video recording of entire sessions, so participants can later review whatever they may have missed or had difficulty understanding. You might interject that in-person meetings can be recorded as well, but this requires setting up equipment, taking care of legibility of the black/whiteboard in the video, and post-processing the recording. Technical complexity equals cost and time. With Zoom, all of this can be accomplished at the press of a button: no extra equipment is needed, and if the presentation was legible for all the participants, it will be automatically also legible in the video.

Installation and use of Zoom are very simple and can be performed on both a computer or a mobile device (tablet/smartphone). Due to the screen size, we recommend a computer or tablet for events which contain a substantial amount of whiteboard work. We give illustrated, step-by-step installation and usage instructions below for your convenience. If this is the first time you are using Zoom and you are about to attend an event with many participants, where personal technical debugging cannot be performed, we recommend you request a separate appointment with us a day or two prior to the event. We will gladly make sure everything works for you, before the actual event starts, such that you have a superb experience.

Instructions for Installation and Joining a Zoom Meeting

General

Zoom refers to their video/web conferences as “meetings”, so that is the terminology we will use on this page for any of our online events.

In order for you to participate in a meeting using Zoom on a laptop or desktop computer, you can either connect with a web browser or have your browser download the desktop Zoom application (zoom.us.app) for you and launch it automatically. We describe both choices below. On a tablet or smartphone, you will need to download the mobile Zoom app (for iPhone/iPad the app “Zoom Cloud Meetings” is available in the App Store).

Note: You do not need to create an account on the Zoom website just to join Zoom meetings (like you would for Skype, WhatsApp, etc.). Accounts are only needed for the conference host, who initiates the meetings (this will always be us). (However, free accounts are available on the Zoom website if you wish to use their technology for your own conferencing purposes.)

Before you can attend a Zoom meeting which we host, you will need to know its unique Meeting ID. You may obtain it either from the page on our website where the meeting has been announced, or you may receive an invitation email from us (after registering for an event which requires registration), like the sample shown on the right. Towards the bottom of the email, you will find the 9-digit Meeting ID. (The top of the email also contains a link which you could open in your web browser to attend the meeting.)

Sample Invitation Email for a Scheduled Meeting

Academic Flight is inviting you to a scheduled Zoom meeting.

Topic: Upset Prevention and Recovery
Time: February 3, 2019 6:00 PM Eastern Time (US and Canada)

Join Zoom Meeting
https://zoom.us/j/110570933

One tap mobile
+16465588656,,110570933# US (New York)
+14086380968,,110570933# US (San Jose)

Dial by your location
        +1 646 558 8656 US (New York)
        +1 408 638 0968 US (San Jose)

Meeting ID: 110 570 933

Find your local number:
https://zoom.us/u/aVQlkCyye

Desktop/Laptop Computer

In this section we provide easy, step-by-step instructions how to join a Zoom meeting from your desktop or laptop computer (for tablets and smartphones see further below). We have illustrated the process with screenshots; you can view larger versions of the images by clicking on the thumbnails. The screenshots were taken on Mac OS X, but Zoom also works with Windows and other operating systems.

Joining a Meeting

1. To join a meeting, go to Zoom’s website, and click on “Join a Meeting” in the menu bar at the top of the page (towards the right of center).

2. You will be prompted to enter a Meeting ID, which is a 9-digit number unique to the event. You can find this Meeting ID number in the meeting invitation email we sent you or on our website where we announced the meeting (this number will be different for each of our meetings).

3. After entering the Meeting ID, you will be asked to provide your name. This is the name tag which will appear next to your video feed and will identify you uniquely among the participants.

4. Now you will be given two choices how to connect: via the Zoom application for desktop/laptop computers, “zoom.us.app” (which is an application that will be installed on your computer if this is your first time attending a meeting, otherwise it will simply automatically open), or you can attend the meeting directly in your web browser window (Google Chrome preferred). We explain these two options below:

Connecting via the Zoom Application (zoom.us.app)

5. If you have the Zoom application already installed, it will launch automatically, after you have performed the above four steps, and open a separate window (in this case, you can skip Step 5 and 6 in these instructions). If you have not installed it yet, the web browser will download the installer package automatically into your downloads folder. The installer looks like this (on Mac OS X – on Windows it will look differently):

6. Double click on the installer package above. It will install the zoom.us.app into your Applications folder:

7. If the Zoom application does not start automatically, you can double click on its icon. For future meetings, rather than going to the Zoom website first, you can simply join the meeting directly by opening this application and typing in the Meeting ID.

8. As you are about to join the meeting, you will be prompted how to establish the audio connection. Either by computer audio, using your computer’s microphone (this is generally the preferred option), or by a separate phone connection, where you would dial a phone number on your phone, followed by the Meeting ID (this option is preferred if your internet connection is so slow that the audio comes in unintelligibly garbled, and other participants cannot hear what you are saying). 

9. The above final step will bring you to the main video conference screen within the app. You can see the main video feed in the center, your and other participants video thumbnails at the top, and a menu bar on the bottom which lets you choose the audio connection, share your screen/windows and chat with participants, mute your microphone, etc. You can now participate in the meeting.

Connecting Directly via a Web Browser Window

5. While the web browser is downloading the installation package (described on the left) or opening up the connection, in the actual browser window, a message will appear which will let you establish the video conference directly in the browser window, rather than in the Zoom application. All you need to do is click on the “join from your browser” link in the window:

6. As the meeting is launching in your browser window, you will be prompted for a selection how to establish the audio. If you use Google Chrome, you will have a choice between choosing a phone line for the audio or to use the computer’s audio connection (just as you were when using the Zoom Application in the lefthand column). If you are using any other browser, including Safari, the computer audio connection will be disabled, and only the phone dial in option will be available, with instructions which number to call. We show these two cases in the images below, respectively:

Audio options using Google Chrome:
Audio options using any other web browser (e.g. Safari):

7. After choosing your audio option above, your browser window will show the main conference screen. It is very similar in layout to the Zoom application window, with the same menu bar at the bottom.

8. You can leave the meeting at anytime by clicking on the red “Leave Meeting” link in the bottom right corner of the window. After you leave the meeting, your browser will display a goodbye message. If you used a browser other than Google Chrome, it will also display a message explaining the benefits of using Google Chrome next time:

iPhone/iPad

In order to attend a Zoom meeting with your iPad or iPhone, you will need to download the “ZOOM Cloud Meetings” mobile app from the App Store first. After that, the process is very similar like using the desktop Zoom application described above: open the app, type in the Meeting ID and the name under which you want to show up for other participants, and you can attend the meeting.

Step-by-step installation instructions are as follows:

Install

You can simply search for the “ZOOM Cloud Meetings” app in the App Store (see screenshot on the far right) and install the app.
 
Alternatively, you can also get started from one of our meeting invitation emails (see frame on the right):
  1. Click on the link/URL at the beginning of the meeting invitation email.
  2. It will open in your mobile web browser (Safari).
  3. Safari will complain that it cannot open the link, saying it must be opened in the App Store, which will take you automatically to the “ZOOM Cloud Meetings” app (see screenshot on the far right).
  4. Download the ZOOM Cloud Meetings app from the App Store.

Sample Invitation Email for a Meeting Currently in Progress


Subject: Please join Zoom meeting in progress


Join Zoom Meeting
https://zoom.us/j/358693765

One tap mobile
+16465588656,,358693765# US (New York)
+14086380968,,358693765# US (San Jose)

Dial by your location
+1 646 558 8656 US (New York)
+1 408 638 0968 US (San Jose)
Meeting ID: 358 693 765

Connect

  1. Open the ZOOM Cloud Meetings app. 
  2. Select “Join a Meeting” (see screenshot on the right). Ignore the “Sign Up” and “Sign In” buttons at the bottom of the screen; you would need those only if you wanted to act as a host and start your own meetings – no registration is needed just to join our existing Zoom meetings as a participant. 
  3. Type in the 9-digit Meeting ID from the email you have received from us.
  4. Choose “Call using Internet Audio” (see screenshot on the far right). (The “Dial in” option would feed sound through a conventional phone connection – you may try that as an alternative if your internet connection is too slow for clear audio.)
  5. When prompted, give the ZOOM Cloud Meetings app permission to access the camera and microphone of your iPad or iPhone, so other participants can see and hear you. (You do not need to give ZOOM permission to send you notifications.)

Conventional Phone

Dial In

In the meeting invitation email, you can find phone numbers, which you can dial, followed by the Meeting ID, in order to participate in the conference with a conventional telephone. You will only get audio this way, without any video. Use this as a last resort option if you would otherwise miss the event. (If you have a smartphone, you should not use this option, as there are better ways to connect with full two-way audio and video (see further above).

Please contact us if you have any connection difficulties or questions
regarding attendance of one of our online events. We will gladly help.

Instructions for Use and Participation

Writing a user’s manual for all of Zoom’s features is beyond the scope of this page, but we do want to highlight a few most commonly used functionalities.

Desktop/Laptop Computer

Participation Usage

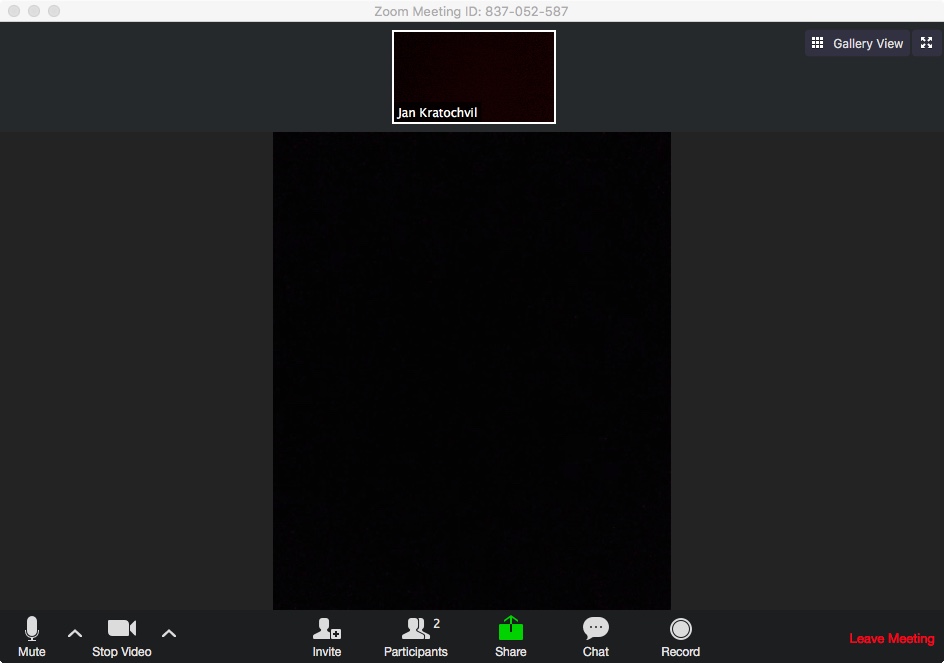
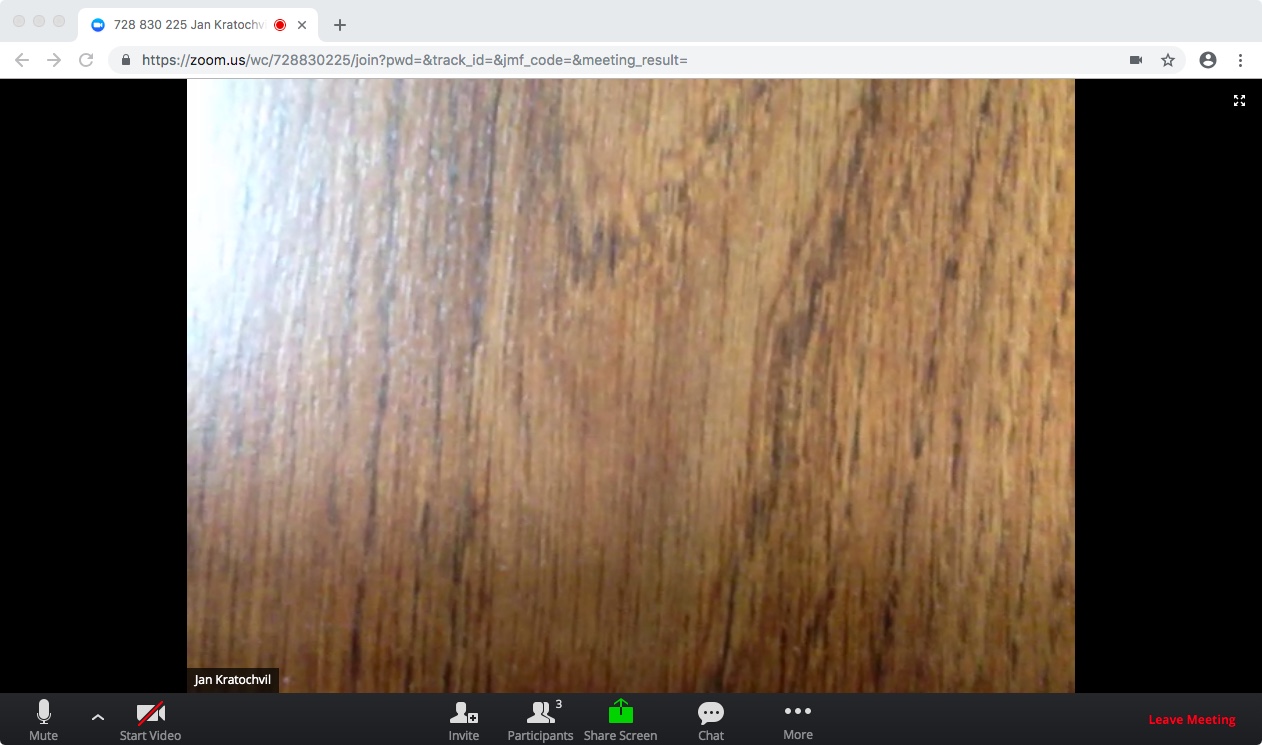
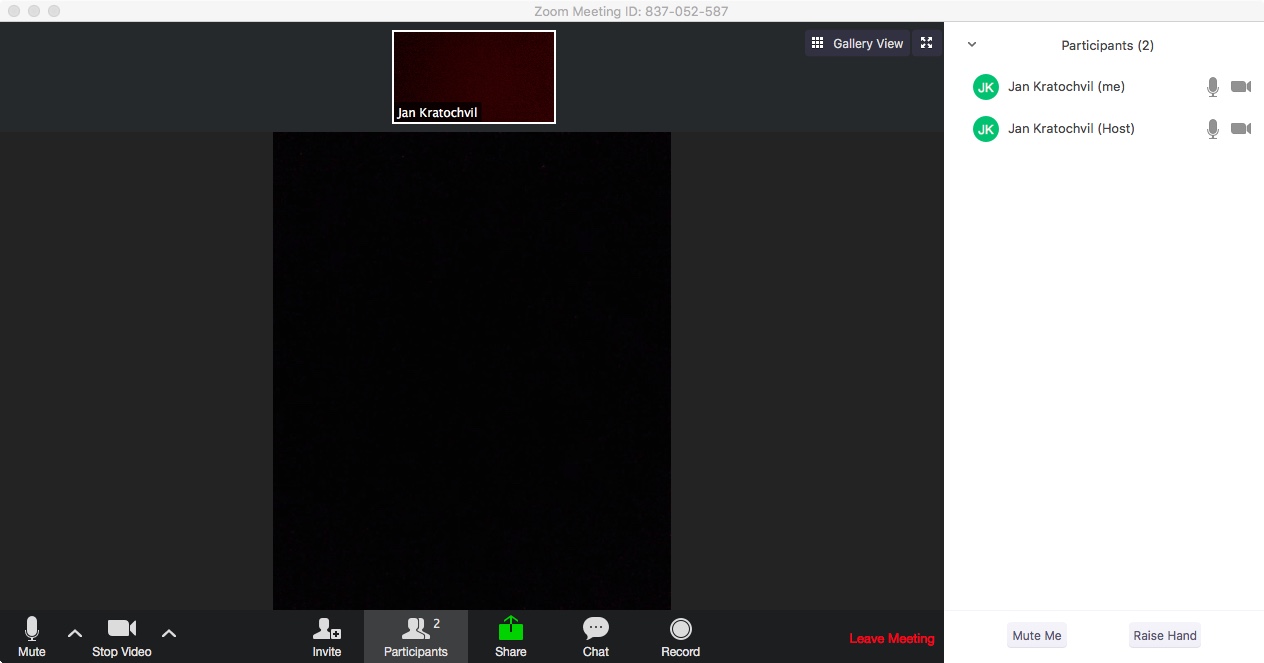
The screenshot on the right shows the main meeting window of the Zoom application (zoom.us.app) on Mac OS X. At the top of the screen, in the small thumbnail with a white frame, you can see yourself (and other participants next to it if there are any).

The black square in the center contains the main video feed, which is typically automatically switched to whoever is currently speaking.

The bottom of the window contains the menu bar. You can mute your microphone (recommended when not speaking to avoid random ambient noise being introduced into the video conference). The “^” symbol takes you to additional audio options. The camera toggles your video on and off (again with additional options available under “^”).

Further across to the right you can invite other participants (e.g. by generating an invitation email to them, like the samples you have seen on this page). The next item lets you view a list of all the participants (an additional sidebar on the right opens up, as illustrated in this screenshot). Note, though, that if you want to see a gallery view of all the participants’ video feeds, this is an item in the upper right corner of the screen, and not this participants tab.

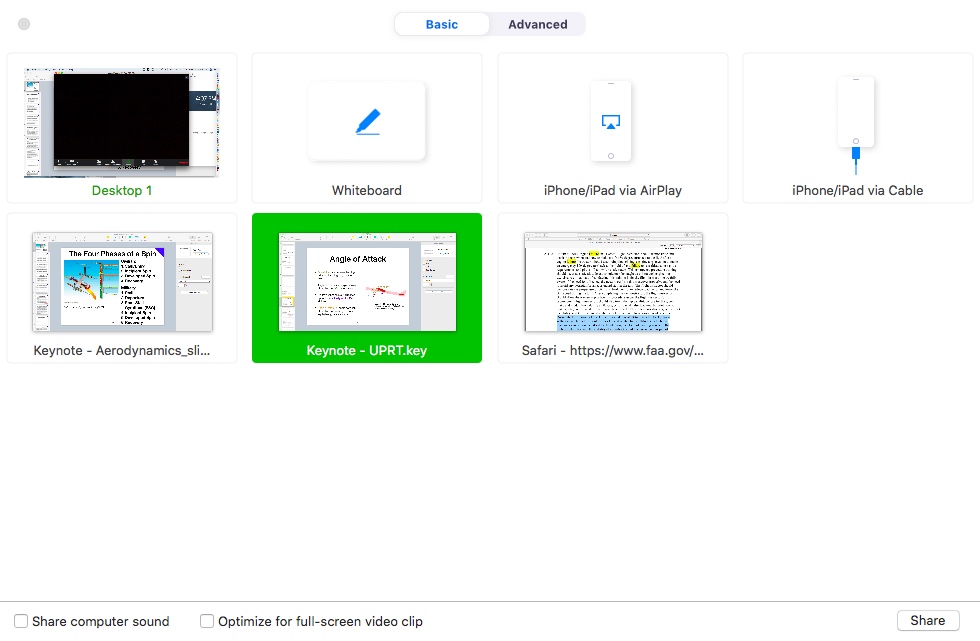
The green share icon lets you share (you will be prompted for a selection after clicking on it):

  • your whole computer screen,
  • an individual window from an application,
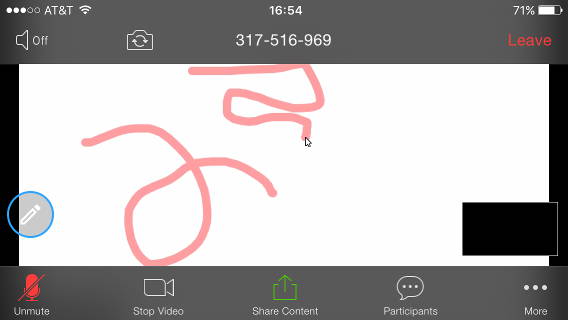
  • an empty digital whiteboard within Zoom, onto which all the participants can write simultaneously,
  • an iPhone or iPad connected to the computer via cable or AirPlay.  
The next menu item lets you chat with participants – either with everyone or with one individual privately. This is useful to have a side conversation with someone without disrupting the audio of the speaker, for instance if you need technical assistance from the meeting moderator.
 
Finally, the record button lets you record the meeting (typically the host will do this for you if you request to retain a video recording of your lesson).

Above: The main window of the desktop Zoom application, showing the main conference video stream, the menu bar at the bottom, and a participants sidebar on the right, with microphone muting and video toggling options.

Above: Selection presented after clicking on the green “Share” menu item. The choices are:

  • “Desktop 1”, sharing the entire computer screen,
  • “Whiteboard”, which is an internal  Zoom document, letting all participants draw upon simultaneously,
  • iPhone/iPad connection options,
  • any other open windows from other applications.

The “Advanced” tab at the top of the window leads you to further selections, including the option of sharing only a selected part of your computer screen.

iPhone/iPad

Participation Usage

During the video conference, you may:

  • Mute your microphone.
  • Turn on and off your camera.
  • Swipe to the left to see small video thumbnails of all the participants (otherwise, on the main screen, you will only see the participant currently speaking and a small image of yourself).
  • Swipe to the right to disable your microphone and camera, and disable viewing anyone (audio only – called the safe driving mode).
  • Text other participants from within the app (via a menu item at the bottom).
  • Share your screen with others (via a menu item at the bottom).
  • If a digital whiteboard is shared by a participant, you may write on your screen to add content to the write pad, together with all other participants. Each participant has be default a different color, but this, too can be changed. (Start writing by clicking on the pencil symbol in a blue circle, after you have tapped the screen showing the shared whiteboard).
The screenshots on the right illustrate some of these features. It is very simple, and you will get the hang of it quickly. Our staff will be available to assist you if you need any help.

The top image illustrates write pad screen sharing. Tapping on the screen made the menu bar at the bottom visible, as well as the pencil icon in the blue circle on the left. Click on the pencil icon to obtain a selection of tools as shown in the bottom image, and to start annotating the write pad together with the other participants. The “Participants” item in the menu bar lets you text-chat with others (in addition to the audio connection).